Theperfectgarden.co.uk may earn a small commission (at no extra cost to the user) from Amazon and other online retailers if a purchase is made after clicking a link. I appreciate your continuing support.
A reader recently wrote and asked, what anti slip paints could she use on a slippery manhole cover? After a quick online search, it was clear there were a whole host of anti-slip paints and products out there that may or may not do the job. These paints are not cheap, so choosing the wrong anti slip product could be an expensive mistake.
How to Choose the Right Anti-Slip Paints and Products
There are four important questions you need to ask when selecting the correct anti-slip product. Once you have answered these questions, you will be 80% of the way to making that area non slip and safer to walk on.
- Is the application going to be used inside or outside?
- Does the product need to be invisible once it has been applied?
- Will the product be permanent?
- Most importantly what surface am I trying to make non-slip?
I decided to put in a good few hours of research to understand exactly what was available and how anti-slip paint and products work. My findings showed that selecting the correct product is the key to securing a slippery surface.
How Anti-Slip Paints and Products Work

A surface can appear safe to walk on until it gets wet and that’s when it can become like a dangerous ice rink. All anti-slip products contain a microbead or aggregate that gives the surface a textured finish. Anti-slip paints can either be applied using a roller or brush. Anti-Slip Tapes and Pads are applied using the self-adhesive backing and placed in position. There are five different types of anti-slip products available to make your surface super safe. Anti-Slip Paints, Adhesive Tapes, Mats, Pads and Sprays.
A Few Dos and Dont’s
- Don’t try to use an anti-slip tape on an uneven surface. It was a tempting solution for the slippery manhole cover but the surface was too uneven. The rain would have got in underneath, weakening the adhesive and the tape would have eventually lifted.
- When using anti-slip paint, ensure the paint will adhere to the surface to be painted. If a surface is already slippery, rough the area with 80 grit sandpaper or score it in a crisscross pattern with an old screwdriver.
- Save money by using anti-slip additives in the paint you are already using. This is basically a grit that when mixed, adheres with the paint to create a non-slippery surface. Ideal for garage floors etc.
How to Make Your Own Anti-Slip Paint.
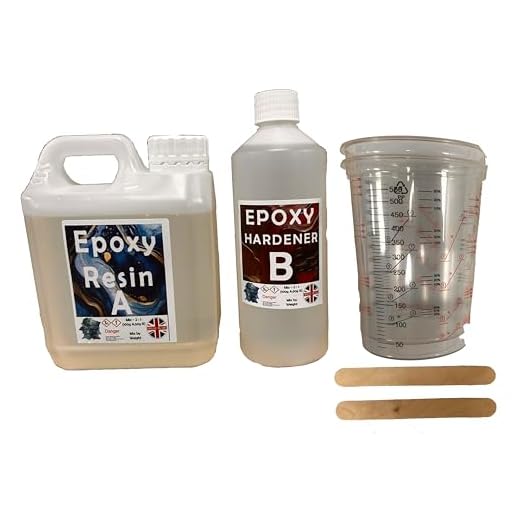
If you cannot find an “off the shelf product” that will stick to your surface, Epoxy resin will stick to virtually any surface except plastic! You could even add a colourant to draw attention to the area.
Make your own anti-slip paint, using a two-part epoxy and sharp sand.
Total Time: 20 minutes
Prepare
A clean dry plastic tub for mixing, some kitchen scales, a piece of wood for stirring, a pair of protective gloves, a quantity of dry sharp sand or play sand.
The Epoxy
Read the mixing instructions that come with the epoxy. It is usually mixed together using a quantity of resin and hardener, with a ratio of 5:1. Place the plastic tub on the scales and pour in the product 1ml = 1 gram. Reset the scales, then pour in the hardener.
Mix the Epoxy Resin
With the two products now in the tub, mix them thoroughly with the stick. If you think you’ve mixed it, mixed it some more!
Apply the Epoxy Resin to the Surface
Epoxy resin has a working time of around 20 minutes before it starts curing, so don’t hang around. Using a paintbrush, thinly apply the resin to the surface to be treated.
Apply the Sand
When the epoxy resin is sticky to touch, scatter the sand by hand over the area. Using a soft hand brush, lightly brush the sand to ensure it covers the whole surface. Allow the epoxy to cure fully before allowing foot traffic in the area.
Notes
Do not mix the sand with the epoxy in the tub. The sand is heavier than the resin and it will sink once applied and this may not give enough of a texture to the surface.
How to Make Surfaces Safer and Less Slippery.
Anti Slip Paints for Wooden Decks
My preference is always natural, untreated wood on decks. Untreated wood tends to dry out quicker and is allowed to breathe and move with the weather. If kept clean, natural decks shouldn’t be slippery. Stained or treated decks can look stunning and if this is your preference they may become slippery when wet. In this case, there are many treatments containing invisible microbeads that make decks safer to walk on.


Steps and Stairs
Stairs are often made from wood and if these become slippery anti-slip tape is a good remedy. The tape has a surface a bit like fine-grade sandpaper with a self-adhesive backing, so it is easy to apply. Make sure that the surface is clean and dry before applying the tape. See below if your stairs or steps are made from other materials like concrete or metal.


Anti-Slip Paints for Concrete and Tiles
There are a few things that you need to take into consideration when making slippery concrete safer to walk on. Concrete is very dusty when dry, so it may be difficult for paint to stick to it. Most anti-slip paints for concrete will cover both interior and exterior surfaces but check before you buy. Likewise, if there is a chance the floor may be subject to grease in a professional kitchen or oil from a workshop, you can buy anti-slip paints that are resistant to oil and grease.
Floor tiles can get extremely slippery, especially in kitchens and bathrooms. Anti-Slip Treatments for floor tiles provide a great non-skid surface. The treatments are easily applied with a roller or brush and are completely invisible once they have dried.


Metal
Metals can often be the most difficult to make safe, simply because of the materials they are made from and this can make the paint difficult to adhere to. Very often the best solution when making metal steps etc safe, is to use anti-slip tape. The self-adhesive glue on the back of the tapes is designed to stick to almost anything. The whole area doesn’t have to be covered, applying strips 6″ apart will suffice and save money too.
The epoxy resin mixture mentioned above can also be a good solution and there are also professional-grade epoxy anti-slip paints for commercial situations.
Showers and Baths
There are two ways you can tackle slippery baths and showers. Using non-slip mats, which stick to the bath or shower base using suction cups moulded into the mat itself. These are great for a quick solution, especially for kids’ bathrooms. However, they can soon become dirty and mouldy. There are also some fantastic anti-slip sprays now available. These clear sprays adhere to all sorts of surfaces. For example, tiles, acrylics, fibreglass and porcelain giving you peace of mind in bathrooms, gyms and wetrooms.